Posted by Nicholas Forth
on July 24, 2023
Are you looking to give your bedroom a fresh new look? One simple and cost-effective way to achieve that is by painting your bed frame. Painting a bed frame can transform its appearance and breathe new life into your sleeping sanctuary. Whether you have a wooden, metal, or upholstered bed frame, this step-by-step guide will walk you through the process of painting your bed frame, ensuring a successful and satisfying result.
Preparing the Bed Frame:
Before you start painting, it's essential to prepare the bed frame properly. Follow these steps to ensure a clean and smooth surface:
- a) Clear the workspace: Start by moving the bed frame to a well-ventilated area with enough space to work comfortably.
- b) Remove the mattress and bedding: Take off the mattress, sheets, and any other bedding materials from the bed frame. This will protect them from paint spills and allow you to access all areas of the frame.
- c) Disassemble (if necessary): If your bed frame has removable parts, such as headboards, footboards, or side rails, take them apart carefully. This will make it easier to paint each component separately and ensure even coverage.
- d) Clean the surface: Thoroughly clean the bed frame using a mild detergent or wood cleaner to remove dust, dirt, and grease. For metal frames, use a metal cleaner or a mixture of vinegar and water to eliminate any rust or stains.
- e) Sand the surface (if needed): If your bed frame has an existing finish or varnish, use sandpaper to lightly sand the surface. This step helps the paint adhere better to the frame and creates a smoother finish. Be sure to wipe away any dust or debris afterward.

Product: Shelton Wooden Bed Frame
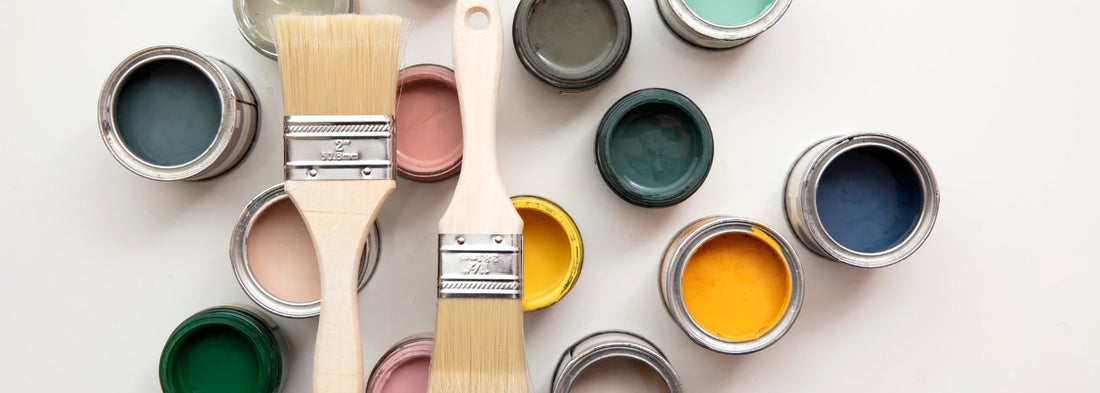
Choosing the Right Paint and Supplies:
Selecting the appropriate paint and supplies is crucial for achieving a professional-looking result. Consider the following factors:
- a) Paint type: For wooden bed frames, opt for a high-quality interior paint with either a satin or semi-gloss finish. These finishes are durable and easier to clean. If your bed frame is metal, look for a paint specifically designed for metal surfaces, such as enamel or spray paint.
- b) Primer: It is recommended to use a primer before painting to ensure better adhesion and a more even finish. Choose a primer that is compatible with your paint type and follow the manufacturer's instructions for application.
- c) Brushes or rollers: Use high-quality brushes or rollers suitable for the paint type you've chosen. For intricate details, use smaller brushes, and for larger areas, opt for a roller. Foam rollers work well for achieving a smooth finish.
- d) Drop cloths and painter's tape: Protect your floor and surrounding surfaces with drop cloths, and use painter's tape to mask off any areas you don't want to paint, such as hardware or upholstery.
Applying the Paint:
Now it's time to bring your bed frame to life with a fresh coat of paint. Follow these steps for a successful painting process:
- a) Apply the primer (if using): Using a brush or roller, evenly apply the primer to the entire bed frame, following the manufacturer's instructions. Allow it to dry completely before proceeding.
- b) Paint the bed frame: Start painting the bed frame with smooth, even strokes. Work methodically from one end to the other, ensuring complete coverage. Apply thin coats rather than thick layers to avoid drips and uneven drying. Allow each coat to dry before applying the next one, following the paint manufacturer's recommended drying times.
- c) Touch up any missed spots: After the first coat has dried, inspect the bed frame for any missed spots or areas that need additional coverage. Use a brush or small roller to touch up those areas carefully.
- d) Repeat as necessary: Depending on the colour and desired finish, you may need to apply multiple coats of paint. Allow sufficient drying time between each coat and continue until you achieve the desired colour and finish.

Product: Shouldham Pine Wooden Bed
Finishing Touches:
Once the final coat has dried, your bed frame is almost ready to be reassembled and enjoyed. Before doing so, keep in mind these final steps:
- a) Protect the finish (optional): To protect the painted surface from scratches and wear, consider applying a clear coat or varnish specifically formulated for your paint type. This will enhance durability and extend the life of your paint job.
- b) Reassemble the bed frame: If you disassembled any parts, carefully reassemble them according to the manufacturer's instructions. Ensure all connections are secure and tighten any loose screws or bolts.
- c) Allow proper curing time: It's important to allow sufficient time for the paint to cure and fully harden before placing the mattress and bedding back on the bed frame. Follow the paint manufacturer's instructions for curing time, typically around 24-48 hours.
Painting a bed frame is an excellent way to revitalise your bedroom and make a personal style statement. By following these step-by-step instructions, you can transform your bed frame into a stunning centrepiece that complements your overall bedroom décor. Remember to take your time, be patient, and enjoy the process. With a little effort, you'll achieve a beautifully painted bed frame that you'll love for years to come. Happy painting!

Nicholas Forth

Director
Nick has put his 15 years of industry expertise into his blog posts. With the goal of making customers more informed, he provides insight into bed design, durability, and the best choices for different lifestyles and needs. His writing combines technical knowledge with practical advice, helping readers understand what really matters when choosing a bed or mattress. Whether breaking down material differences, exploring trends in bedroom design, or sharing tips on maximising comfort, he ensures every post is both educational and easy to follow.


