
Posted by Nicholas Forth
on August 04, 2023
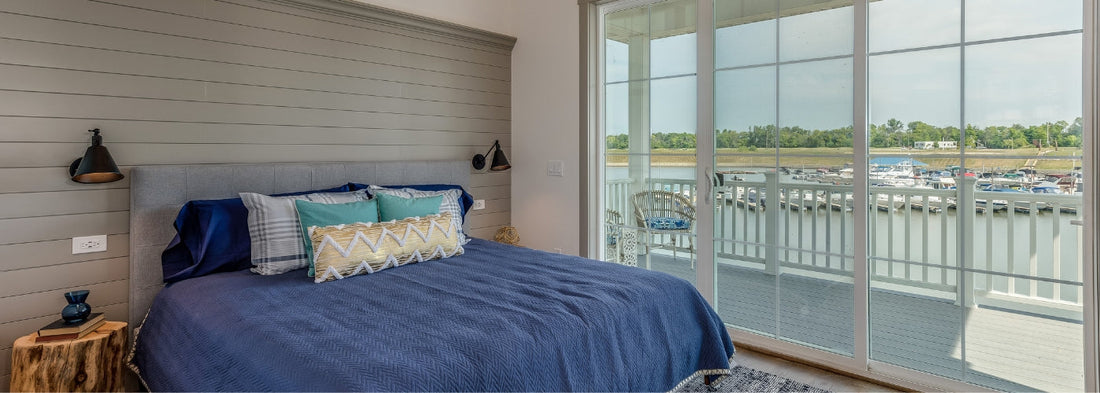
Panelling has long been associated with timeless elegance and sophistication, adding a touch of classic charm to any interior space. If you're looking to elevate your bedroom design and create a luxurious retreat, incorporating panelling is an excellent choice. In this comprehensive guide, we'll walk you through the process of how to do panelling in a bedroom, from selecting the right materials to the installation process and finishing touches.
Step 1: Plan Your Design
Before diving into the panelling process, take some time to plan your design. Consider the style and atmosphere you want to achieve. Classic raised panelling offers a traditional look, while shiplap panelling can evoke a coastal or farmhouse vibe. Determine the height and width of the panels, as well as the spacing between them. Sketch your vision on paper or use digital design tools to visualise the end result.

Step 2: Choose the Right Materials
Selecting the right materials is crucial for achieving a stunning panelling effect. Common options include MDF (medium-density fibreboard), plywood, or hardwood. MDF is cost-effective and easy to work with, while plywood is more durable. Hardwood provides a luxurious finish but comes at a higher cost. Choose materials that complement your bedroom décor and fit your budget.
Step 3: Measure and Mark
Measure the walls where you plan to install the panels, and mark the placement of each panel on the wall using a level and pencil. Ensure that the panels are evenly spaced and aligned to create a cohesive look.
Step 4: Cut the Panels
With the measurements in hand, cut the panels to the desired size using a saw. Use a jigsaw or circular saw to make precise cuts for any intricate panel designs.
Step 5: Install the Panels
Start the installation process by attaching the panels to the wall. Use construction adhesive to secure the panels in place, and then reinforce with finishing nails or screws for added stability. Make sure the panels are level and flush with the wall surface.
Step 6: Add Trim and Moulding
To give your panelling a polished look, add trim and moulding around the edges of the panels. This will create a seamless transition between the panels and the surrounding walls, enhancing the overall aesthetic.

Step 7: Caulk and Fill Nail Holes
Once the panelling and trim are in place, use caulk to fill any gaps or seams between the panels and the walls. Sand down any rough edges and fill nail holes with wood filler, ensuring a smooth and seamless finish.
Step 8: Prime and Paint
Before applying paint, ensure the panelling is clean and free from any dust or debris. Apply a primer to the panels to create a smooth surface for paint adhesion. Choose a paint colour that complements your bedroom décor and adds the desired ambiance to the space. A classic white or a soothing pastel shade can create a serene and elegant atmosphere, while bolder colours can add a pop of personality.
Step 9: Consider Wainscoting
If you want to take your panelling to the next level, consider incorporating wainscoting. Wainscoting is a type of panelling that typically covers the lower portion of the wall, adding an extra layer of sophistication and visual interest.

Step 10: Finishing Touches
Complete the panelling project with the right finishing touches. Add decorative elements such as wall sconces, artwork, or mirrors that complement the panelling design and enhance the overall look of the bedroom.
Panelling in a bedroom is a design choice that never goes out of style. By following this step-by-step guide, you can transform your bedroom into a luxurious and elegant retreat. From planning the design to selecting the materials and adding finishing touches, the panelling process allows you to create a space that reflects your personal style and enhances the overall ambiance of the room. So, embrace the timeless charm of panelling and elevate your bedroom design to new heights of sophistication and beauty.

Nicholas Forth

Director
Nick has put his 15 years of industry expertise into his blog posts. With the goal of making customers more informed, he provides insight into bed design, durability, and the best choices for different lifestyles and needs. His writing combines technical knowledge with practical advice, helping readers understand what really matters when choosing a bed or mattress. Whether breaking down material differences, exploring trends in bedroom design, or sharing tips on maximising comfort, he ensures every post is both educational and easy to follow.


